
 EN
EN
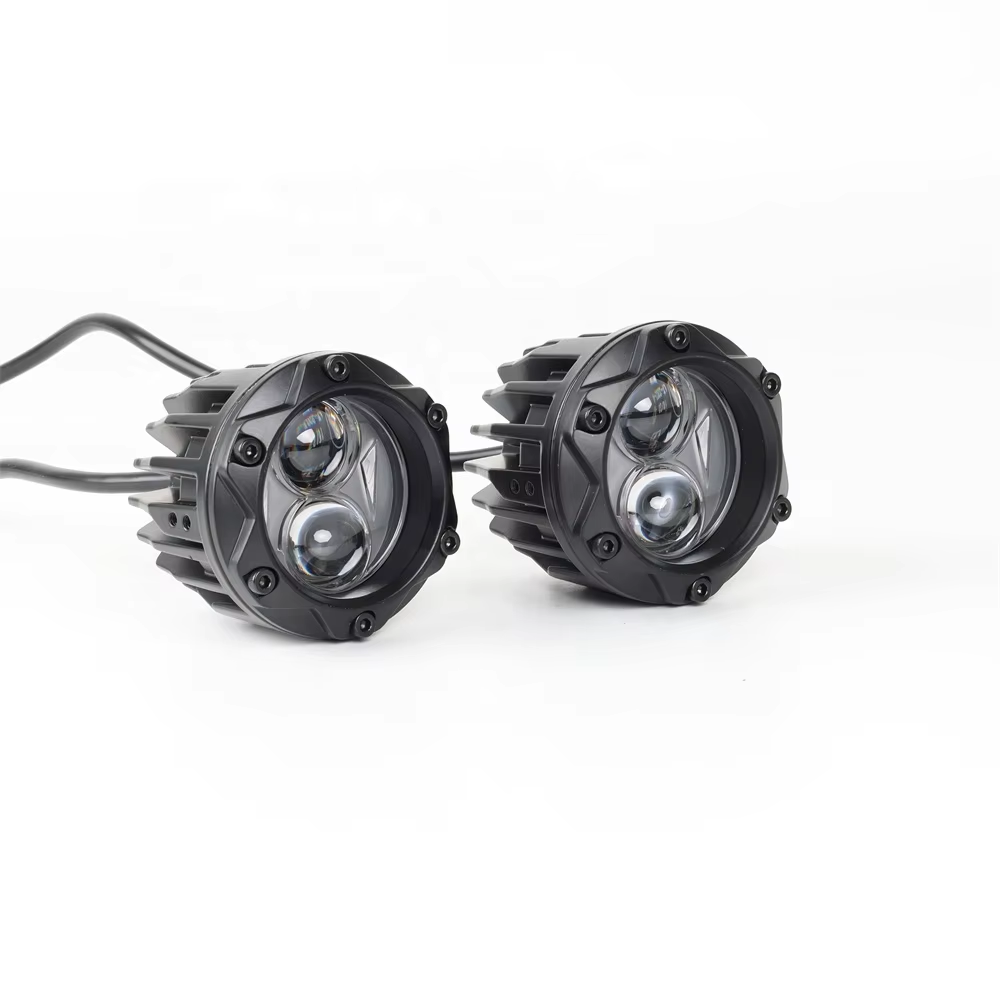
Pre-Installation Planning: Matching Fog Lights to Riding Conditions and Bike Architecture
Fog Lights vs. Driving Lights: Beam Pattern, Cutoff Design, and Glare Control for Wet/Dusty Roads
Fog lights and driving lights serve fundamentally different purposes—choosing the right type hinges on your typical riding environment. Fog lights emit a wide, low-mounted beam with a sharp horizontal cutoff, engineered to minimize backscatter from rain, fog, or dust. This design illuminates road edges and surface hazards without blinding oncoming traffic—a critical safety advantage in low-visibility conditions. Driving lights, by contrast, project a narrow, long-range beam ideal for open highways but counterproductive in wet or dusty settings, where their intensity exacerbates glare and reduces usable visibility. For motorcycle auxiliary fog lights, precise beam control—not raw output—is the priority: a clean cutoff and proper mounting height ensure compliance with road safety standards like ECE R19 and SAE J583.
Motorcycle-Specific Constraints: Fairing Clearance, Vibration Zones, and OEM Integration Points
Motorcycles impose tighter physical constraints than cars, making pre-installation assessment essential. Sport and naked bikes often have minimal fairing clearance, especially around the nose cone or lower fork shrouds, limiting bracket placement options. Avoid high-vibration zones—such as engine casings, exhaust mounts, or swingarm pivot points—as sustained resonance can fatigue fasteners and misalign optics over time. Instead, prioritize factory-approved integration points: pre-threaded holes on crash bars, radiator supports, or OEM accessory brackets offer structural integrity without drilling or permanent modification. Confirm that installed lights maintain full steering lock, clear brake lines and suspension travel, and remain shielded from road debris, heat radiation, and direct water spray.
Mechanical Mounting: Secure, Aerodynamic, and Adjustable Installation of Auxiliary Fog Lights
Proper mechanical mounting ensures optical accuracy, long-term durability, and aerodynamic stability. Select brackets engineered for motorcycle use—ideally CNC-machined aluminum or stainless steel—with integrated rubber isolation washers to dampen vibration-induced stress on housings and wiring.
Bracket Selection and Adventure-Bike Fairing Removal Protocols
Adventure bikes typically require partial fairing removal to access robust mounting surfaces. Consult your service manual for clip locations and torque specs; use a plastic trim tool to avoid marring painted or textured panels. Label and photograph each fastener before removal to streamline reassembly. Once the fairing is off, dry-fit the bracket to verify clearance across full handlebar rotation, horn operation, and brake line routing. Prioritize adjustable brackets that allow fine-tuning of vertical and horizontal aim—critical for achieving the SAE-recommended 15° downward tilt and 2–4° inward convergence. Final tightening must follow manufacturer torque values, and threadlocker (e.g., Loctite 242) should be applied to all exposed fasteners.
Airflow & Vibration Management: Oil Cooler Clearance, Wind Deflection, and Damping Techniques
Mount lights at least 50 mm (2 inches) from oil coolers, radiators, or air intakes to preserve cooling efficiency. Integrate rubber isolators between bracket and light housing to absorb high-frequency vibrations that compromise LED longevity and optical alignment. Angle pods slightly inward (1–2°) to reduce frontal drag and mitigate high-speed oscillation. If your bike features a windscreen, position lights just below its trailing edge to exploit laminar airflow and minimize turbulence-induced wobble. After installation, run the engine at idle and through RPM ranges while checking for rattles or resonance. Route and secure all wiring with UV-resistant zip ties—keeping it clear of hot exhaust components, moving suspension links, and pinch points near fairing seams.
Electrical Integration: Safe, Reliable, and Ignition-Synchronized Wiring for Motorcycle Auxiliary Fog Lights
Relay-Based Circuits and Fused Power Sourcing to Prevent Battery Drain and Overload
A relay-based circuit is non-negotiable for auxiliary lighting on modern motorcycles. It separates the high-current load of the fog lights (typically 8–12 A per pair) from the low-capacity factory switchgear and ignition harness—preventing overheating, voltage drop, and premature switch failure. Run a dedicated, fused power feed directly from the battery’s positive terminal to the relay’s input (terminal 30), using wire gauge appropriate for the load (e.g., 14 AWG for up to 15 A). Fuse rating should exceed the lights’ max draw by ~25%—commonly 10–15 A—and be placed within 18 inches of the battery. The relay coil (terminals 85/86) is triggered by a low-amperage signal, such as the high-beam circuit or a dedicated toggle switch. This architecture eliminates parasitic drain and maintains stable system voltage during operation.
Switched Ignition Integration for Automatic Shutdown and OEM Electrical Compliance
For seamless, OEM-like behavior, connect the relay’s trigger wire to an ignition-switched accessory circuit—such as the tail light feed or an auxiliary fuse block output—rather than a manual switch alone. This ensures fog lights deactivate automatically when the key is turned off, eliminating risk of accidental battery depletion. Verify circuit integrity with a multimeter: the selected wire must show 0 V with ignition off and stable 12–14.5 V with ignition on and engine running. All splices must be soldered and sealed with adhesive-lined heat-shrink tubing (e.g., 3M™ Scotchlok™), not wire nuts or tape. Routing should follow factory harness paths, secured with mounting clips and protected where passing through frame grommets or near heat sources. This approach meets SAE J1292 electrical compatibility guidelines and supports long-term reliability in harsh, vibration-prone environments.
FAQ Section
What is the difference between fog lights and driving lights?
Fog lights are designed for low-visibility conditions like rain, fog, or dust, emitting a wide, low-mounted beam with minimal glare. Driving lights, on the other hand, provide a narrow, long-range beam ideal for clear highways.
Why is pre-installation planning important for motorcycles?
Motorcycles have tight physical constraints, such as limited fairing clearance and vibration zones. Proper planning ensures correct installation, prevents component fatigue, and avoids interference with essential functions like steering and suspension.
What type of brackets are best for mounting fog lights?
CNC-machined aluminum or stainless steel brackets with integrated rubber isolators are ideal for motorcycle fog lights, offering durability and vibration damping.
How do I ensure safe electrical integration of auxiliary fog lights?
Use a relay-based circuit with a fused power source directly from the battery. Connect the relay’s trigger wire to an ignition-switched accessory circuit to prevent battery drain when the ignition is turned off.
Table of Contents
- Pre-Installation Planning: Matching Fog Lights to Riding Conditions and Bike Architecture
- Mechanical Mounting: Secure, Aerodynamic, and Adjustable Installation of Auxiliary Fog Lights
- Electrical Integration: Safe, Reliable, and Ignition-Synchronized Wiring for Motorcycle Auxiliary Fog Lights
- FAQ Section
